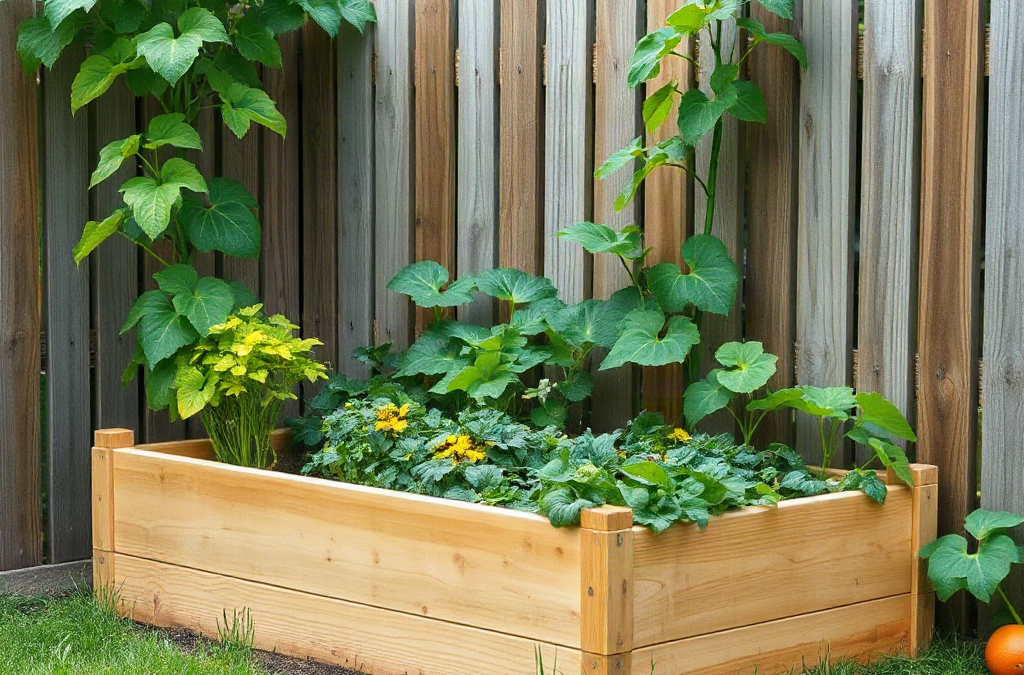
Small-yard raised bed vegetable gardening for beginners works best with one accessible bed placed in strong sunlight, filled with a stable soil blend, and planted with compact crops matched to the season. A bed about 3 to 4 feet wide allows gardeners to reach the center without stepping on and compacting the soil. Reliable results depend on checking moisture below the surface, spacing plants at mature size, and keeping tall crops from shading shorter vegetables. Beginners should prioritize productive plants such as leaf lettuce, bush beans, peppers, radishes, and compact tomatoes rather than crowding every available inch.
What you’ll learn
This guide covers the following practical points:
- Choose the Bed Location and Size — Sun exposure and physical access should determine where the first bed goes.
- Build and Fill the Raised Bed — A durable raised bed needs stable walls, free drainage, and soil that holds both air and moisture.
- Plan Vegetables for Limited Space — Small beds produce more usable food when crop selection reflects mature plant size, season, and household preferences.
- Water, Feed, and Protect the Crops — Raised-bed soil often drains and warms faster than surrounding ground, so moisture must be checked where roots are growing.
Choose the Bed Location and Size
Sun exposure and physical access should determine where the first bed goes. Fruiting vegetables such as tomatoes, peppers, cucumbers, and beans generally perform most reliably in a location receiving at least six hours of direct sun during the growing season. Leafy vegetables tolerate somewhat less, but a heavily shaded yard will not become productive merely because the soil is raised.
Observe the yard before building. Check where morning and afternoon shadows fall, where rainwater collects, and whether roof runoff hits the proposed site. Avoid low spots that remain wet and narrow passages where a bed would obstruct gates, trash bins, hoses, or routine maintenance. Nearby tree roots can enter a bed and compete for water; tree canopies also cast more shade after leaf-out than they do in early spring.
A width of 3 to 4 feet works for a bed approached from both sides. Against a fence or wall, keep it closer to 2 feet wide so every plant remains reachable without stepping into the soil. Length can fit the yard, although one 4-by-6-foot bed is often easier for a beginner to irrigate and manage than several disconnected boxes. Leave pathways at least wide enough for comfortable walking, kneeling, and carrying a watering can. Wider access is needed for a wheelbarrow or mobility aid.
Depth is a separate decision from height. Many common vegetables can grow in roughly 10 to 12 inches of usable soil when the bed is open to suitable ground underneath. A taller structure may reduce bending, but it takes more material to fill and can dry faster along exposed sides. Placing a shallow box over concrete creates a container-like system with restricted drainage and root depth; in that situation, a deeper planter with unobstructed drain holes is the safer choice.
Build and Fill the Raised Bed
A durable raised bed needs stable walls, free drainage, and soil that holds both air and moisture. Untreated rot-resistant lumber, galvanized metal beds, masonry, and purpose-built composite boards are common options. Material choice affects cost, appearance, heat exposure, and service life, but no wall material compensates for a poor location or unsuitable soil.
Remove aggressive perennial weeds before installation. Cardboard placed over short grass can suppress vegetation while decomposing, but it will not reliably stop persistent roots such as bindweed or established tree suckers. Do not line the bottom with solid plastic because trapped water can deprive roots of oxygen. Hardware cloth may be useful where burrowing rodents are a known problem, provided water can still drain freely.
Fill the bed with a blended growing medium rather than a single material. A practical mix combines screened topsoil or mineral soil for structure, mature compost for organic matter, and a light component such as a commercial raised-bed mix where extra drainage is needed. Exact proportions vary with local materials. Soil that is almost entirely compost can settle sharply, retain excess salts, or become difficult to wet evenly after drying; inexpensive fill dirt may compact into a dense mass.
Add the ingredients in shallow layers and mix them throughout the bed instead of leaving sharply separated strata. Water once after filling, allow the surface to settle, and top it up before planting. The finished soil should feel crumbly and moist without squeezing out water. A soil test is the most dependable way to identify pH or nutrient problems, especially when native soil or bulk material of uncertain origin is used.
A common cost-saving mistake is filling most of the box with logs, branches, or undecomposed yard debris without accounting for settling and nitrogen demand. Coarse woody material may suit a deliberately managed deep bed, but it reduces the dependable root zone in a small box. Beginners usually get a more predictable first season by reserving the upper 10 to 12 inches for consistent growing soil.
Plan Vegetables for Limited Space
Small beds produce more usable food when crop selection reflects mature plant size, season, and household preferences. Leaf lettuce, radishes, green onions, chard, bush beans, peppers, herbs, and compact tomato varieties offer practical choices. Pumpkins, sprawling winter squash, sweet corn, and full-size vining tomatoes can overwhelm a single bed unless their vines or stems are directed outside the growing area.
Read seed packets and plant labels for final spacing rather than arranging seedlings by their small nursery size. Crowding may look efficient at planting time, but overlapping foliage restricts airflow and creates intense competition for light and water. Thin direct-sown carrots, beets, and radishes promptly. For crops with different harvest dates, short-term overlap can be useful: radishes may mature before a nearby pepper needs its full footprint.
Place trellises and tall crops on the side of the bed least likely to shade shorter plants during the main part of the day. In much of the Northern Hemisphere, that is commonly the north side, although nearby buildings and seasonal sun angles can change the pattern. Secure supports before vines become heavy. Cucumbers and pole beans can use vertical space, but they still need adequate root room and regular harvesting.
| Small-Bed Crop | Space-Saving Value | Main Constraint |
|---|---|---|
| Leaf lettuce | Harvest outer leaves over several weeks | Heat can cause bitter flavor and flowering |
| Radishes | Fast crop for gaps between slower plants | Roots become woody if harvest is delayed |
| Bush beans | No trellis required | Need repeated picking during production |
| Compact tomato | High-value crop in a defined footprint | Requires support and consistent moisture |
| Climbing cucumber | Uses vertical rather than ground space | Trellis may shade neighboring crops |
Succession planting extends production without adding another bed. Replace finished spring radishes or lettuce with bush beans, basil, or another locally suitable warm-season crop. Later, quick-growing greens may occupy space after summer plants decline. The planting sequence must follow local frost dates and seasonal heat; a calendar from another climate is less useful than regional extension guidance.
Water, Feed, and Protect the Crops
Raised-bed soil often drains and warms faster than surrounding ground, so moisture must be checked where roots are growing. Push a finger several inches into the bed or use a small trowel to inspect the soil. If the root zone feels dry and loose, water slowly enough to soak it rather than wetting only the surface. Daily light sprinkling can encourage shallow roots while leaving lower soil dry.
Watering frequency cannot be fixed to one universal schedule. Hot weather, wind, bed material, plant size, and soil composition all change demand. A newly planted bed may need close observation because seedlings have limited roots, while established crops can draw water from a larger volume. Drip tubing or a soaker hose reduces hand-watering time, but emitters should be checked for clogs and positioned near plants rather than assumed to cover the entire bed.
Apply 1 to 2 inches of clean straw, shredded leaves, or another suitable organic mulch after seedlings are established and the soil has warmed. Mulch slows evaporation and suppresses many annual weeds, but piling it against stems can shelter pests and keep crowns too damp. Leave a small open ring around each plant and pull mulch aside temporarily when sowing tiny seeds.

Compost contributes organic matter, but it does not guarantee balanced fertility. Pale leaves, weak growth, or poor production may reflect nutrition, cold soil, root damage, excess water, or insufficient sunlight. Avoid responding to every symptom with more fertilizer. Use a soil test when practical and apply any fertilizer according to its label and the crop’s needs. Excess nitrogen can produce lush tomato foliage with disappointing fruiting.
Inspect leaf undersides and growing tips several times a week. Hand removal, barriers, and prompt pruning of badly damaged tissue are often manageable in a small bed. Identify the pest before treating it; holes in leaves do not reveal whether the cause is a caterpillar, beetle, slug, or earlier damage that has already stopped. Covers can exclude insects, but they may need removal when crops require pollinator access.
Follow a Small-Yard Planting Plan
A restrained first-season plan makes watering, spacing, and harvest timing easier to evaluate. Consider an illustrative 4-by-6-foot bed receiving seven hours of summer sun, with access from both long sides. The gardener wants salad ingredients and a modest supply of warm-season vegetables rather than bulk storage crops.
Place a trellis along the north edge and allocate it to two climbing cucumbers. Set one compact tomato near a corner where its cage will not block the path, then place two peppers with enough room for their mature canopies. Use the remaining open areas for short rows or small blocks of leaf lettuce, radishes, and green onions. Crop spacing should follow the selected varieties’ labels because a dwarf tomato and an indeterminate tomato have very different footprints.
The seasonal sequence can proceed as follows:
- Before planting: Confirm sun exposure, mix and settle the soil, arrange irrigation, and install the trellis.
- During cool weather: Sow lettuce, radishes, and green onions where later crops will not immediately displace them.
- After local frost risk passes: Add the tomato, peppers, and cucumbers when weather and soil conditions suit those crops.
- As early crops finish: Remove roots and tired foliage, add a light compost top-dressing if needed, and replant open pockets.
- After harvest: Record which plants crowded neighbors, where shade developed, and how quickly each area dried.
Signs that the plan is working include steady new growth, soil that remains evenly moist without staying saturated, reachable plants, and harvests before crops become overmature. Persistent wilting despite wet soil, standing water, elongated plants leaning toward light, or constant overlap between neighboring crops signals a design or management problem. Correct the cause rather than adding more plants, water, or fertilizer.
The main limitation of an intensive plan is that every failure affects a larger share of the available space. Losing one tomato in a single-bed garden matters more than losing one among several beds. Keeping the crop mix modest and leaving a little unplanted room provides flexibility for replacements, succession sowing, and access.
Conclusion
A productive small-yard bed depends more on placement and disciplined crop selection than on elaborate construction. Begin with one reachable box, protect its drainage, and reserve the root zone for dependable soil rather than bulky filler. Plant according to mature size, monitor moisture beneath the surface, and treat the first season as a record of shade, water use, pest pressure, and harvest timing. Those observations will show whether the next improvement should be a trellis, irrigation adjustment, different crop mix, or a second bed.
Frequently Asked Questions
How deep should a beginner’s raised vegetable bed be?
About 10 to 12 inches of usable soil suits many common vegetables when the bed is open to healthy, drainable ground. Beds over pavement generally need greater depth and reliable drainage because roots cannot extend into soil below.
What vegetables are easiest to grow in one small raised bed?
Leaf lettuce, radishes, bush beans, green onions, chard, peppers, and compact tomatoes are manageable choices. Select crops your household will eat and avoid large sprawling varieties unless they can grow vertically or trail beyond the bed.
How often should a raised bed be watered?
Water when the soil several inches below the surface begins to feel dry, not according to a rigid calendar. Heat, wind, plant size, mulch, and soil composition can shift the interval from one part of the season to another.
Can a raised bed be placed directly on grass?
Yes, after removing persistent weeds and mowing the grass short. A layer of plain cardboard can suppress remaining turf while allowing drainage, but invasive perennial roots should be removed rather than merely covered.
Does raised-bed soil need to be replaced every year?
No. Remove diseased debris, loosen compacted areas without disrupting roots, and replenish settled soil with appropriate compost or growing mix. A soil test can show whether pH or nutrients require correction instead of routine replacement.