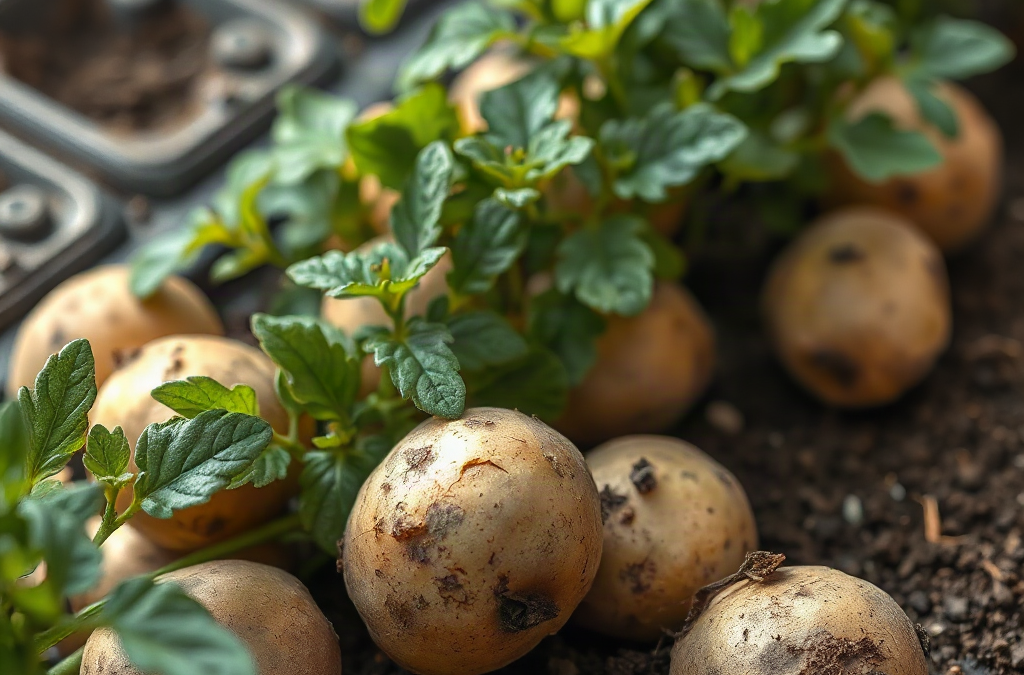
Grow potatoes in containers or garden beds by planting certified seed potatoes in loose, well-drained soil, keeping the developing tubers covered, and watering consistently without leaving the root zone saturated. Containers need drainage holes and enough depth for roughly 12 inches of soil, while beds benefit from hilling soil around the stems as plants grow. Give plants at least six hours of direct sun and check moisture below the surface rather than watering on a fixed schedule. Yellowing foliage near maturity is normal, but blackened stems, foul-smelling seed pieces, or persistently soggy soil signal trouble.
Should You Grow Potatoes in Containers or Garden Beds?
Containers offer tighter control over soil and harvesting, while garden beds provide steadier moisture and more room for roots. The better choice depends less on expected yield than on sunlight, drainage, available ground, and how closely you can monitor watering. Potatoes need at least six hours of direct sun, but afternoon shade can be useful where containers become hot and dry quickly.
A container is practical for a patio, compact yard, or site with heavy or contaminated ground. Choose a sturdy vessel with multiple drainage holes and a finished soil depth of about 12 inches or more. A broad container is generally more useful than a very tall, narrow one because potato roots and tubers spread outward. Fabric grow bags release excess moisture readily, although their exposed sides dry faster than rigid pots. Plastic containers retain moisture longer but can overheat in strong sun.
Do not crowd a small pot with several seed pieces in an attempt to increase production. Crowding creates dense foliage, rapid water use, and many undersized tubers. One seed piece in a container roughly 10 to 15 gallons is a manageable starting point; a wider vessel can hold more when the pieces remain about 10 to 12 inches apart. Exact capacity matters less than usable soil volume and drainage.
Garden beds are preferable when the soil is loose enough to dig without smearing or compacting. Raised beds warm earlier and drain better than low, wet ground, but they can require more irrigation in summer. In-ground rows conserve moisture well and make hilling straightforward. Heavy clay does not automatically rule out potatoes, but planting into sticky, waterlogged soil encourages misshapen tubers and decay. Build a raised row or use containers rather than trying to correct dense clay with a small planting-hole amendment.
Where potatoes or other nightshade crops have recently grown, a container filled with fresh potting mix can also reduce carryover problems from the previous site. Tomatoes, peppers, and eggplants share some pests and diseases with potatoes, so rotating to a different bed is a sensible precaution. Whichever system you choose, place it near a water source; inconsistent moisture is harder to correct than a less-than-perfect container style.
How Do You Choose Seed Potatoes and Planting Time?
Certified seed potatoes are the safest planting stock because they are produced for propagation and inspected under established seed programs. Grocery-store potatoes may be treated to delay sprouting, and untreated ones can still carry disease. Small seed tubers can be planted whole. Larger ones may be cut into pieces, provided each piece has at least one sound eye and enough flesh to support early growth.
A piece around the size of a small egg is easier to manage than a thin slice with a single eye. Use a clean knife, discard any tuber with soft rot or a foul odor, and allow cut surfaces to dry in a cool, ventilated place before planting. The surface should feel dry rather than wet. This brief curing step lowers the chance that freshly cut tissue will decay in cold soil, though it cannot compensate for saturated conditions.
Planting time should follow soil condition rather than the first warm afternoon. Potatoes tolerate cool weather, but seed pieces planted into cold, soaked ground may rot before vigorous roots form. Plant when the bed is workable and no longer sticky, typically a few weeks before the last expected spring frost in many climates. Emerging shoots can be damaged by a hard freeze, so keep loose soil, straw, or frost protection available if an abrupt cold night is forecast.
Variety choice changes the harvest schedule and storage potential. Early varieties mature sooner and suit short seasons or gardeners who want tender new potatoes. Main-season types remain in the ground longer and often make better candidates for a mature harvest. Container growers may find compact or early varieties easier to finish before summer heat intensifies. Skin color is not a reliable indication of maturity; consult the variety description and watch the plant itself.
Pre-sprouting, sometimes called chitting, is optional rather than mandatory. Set seed potatoes in bright, indirect light at cool room temperatures until they form short, sturdy shoots. Long, pale sprouts formed in a dark cupboard break easily and indicate that the tuber has been stored too warmly or without light. Pre-sprouting may provide a useful head start in cool regions, but planting sound, unsprouted seed into suitable soil also works.
Planting Depth, Spacing, and Hilling
Potatoes form their crop on underground stems above or around the planted seed piece, so loose soil, adequate spacing, and continued coverage shape the usable harvest. Start seed pieces about 3 to 4 inches deep with the eyes or sprouts facing upward. In rows, leave approximately 10 to 12 inches between plants and enough room between rows to pull soil toward the stems later.
Use a loose, moisture-retentive medium that still drains freely. Garden soil alone is usually too dense for a container and may compact after repeated watering. A quality potting mix combined with finished compost provides a more stable balance. In beds, incorporate mature compost across the planting area rather than filling each hole with rich material. Fresh manure can burn roots, encourage excessive leafy growth, and introduce an uneven nutrient load.
Hilling means drawing soil around the lower stems after plants emerge. Begin when shoots are roughly 6 to 8 inches tall, covering the lower portion while leaving several inches of foliage exposed. Repeat as stems lengthen until a broad hill has formed. In containers, begin with a partial fill and add mix in stages. Do not bury the entire plant, and do not assume that continuously filling an extremely tall tower will produce potatoes through every layer. Many varieties set tubers within a limited zone, so added height beyond effective coverage often increases cost and watering difficulty without a matching harvest.
The main purpose of hilling is to shield developing tubers from light and create workable soil around them. Sunlight turns exposed potato tissue green and promotes glycoalkaloid accumulation, so green potatoes should not be eaten. Check hills after heavy rain because soil can wash away from shallow tubers. In containers, inspect the rim and side gaps where settling mix may expose the crop.
A simple planting sequence keeps the work controlled:
- Fill the bed furrow or container base with loose growing medium.
- Place sound seed pieces at their final spacing with sprouts upward.
- Cover with 3 to 4 inches of soil or potting mix and water gently.
- Add more material around the stems once growth reaches 6 to 8 inches.
- Maintain a final protective layer without burying all active leaves.
Straw can supplement a soil hill, especially near the top, but it dries quickly and may shelter slugs or rodents. Soil provides better exclusion of light and more even moisture. If straw is used, check beneath it regularly rather than treating it as a maintenance-free replacement.
How Should You Water, Feed, and Troubleshoot Potato Plants?
Even moisture matters most from flowering through tuber enlargement. A dry spell followed by heavy watering can contribute to irregular growth, while constantly wet soil deprives roots and seed pieces of oxygen. Push a finger about 1 to 2 inches into the soil; water when that layer feels dry, then apply enough to moisten the root zone. Containers may need frequent checks during hot or windy weather, whereas mulched beds usually change more slowly.

Water at soil level early enough for wet foliage to dry. Overhead watering is not automatically harmful, but leaves that remain wet for long periods can create favorable conditions for foliar disease. A saucer holding standing water under a pot defeats the purpose of drainage holes. If a container remains heavy and wet for days, confirm that its openings are clear and reduce watering until air returns to the mix.
Potatoes use substantial nutrients, yet more fertilizer does not necessarily mean more tubers. Excess nitrogen often produces tall, dark foliage at the expense of underground growth. Mix finished compost into the bed before planting and, if needed, use a fertilizer labeled for vegetables according to its directions. A soil test gives better guidance than guessing, particularly in an established garden where phosphorus or potassium may already be adequate.
Healthy plants develop sturdy stems and evenly colored leaves, and the soil should smell earthy rather than sour. Lower leaves may yellow late in the crop as maturity approaches. Early yellowing combined with soggy soil, collapsing stems, or soft tissue points toward a root-zone problem rather than normal aging. Pale growth across the whole planting can reflect low fertility, compacted roots, excessive moisture, or unsuitable pH, so inspect conditions before adding fertilizer.
Colorado potato beetles and their larvae can remove foliage rapidly. Examine leaf undersides and remove egg clusters or insects when populations are still small. Flea beetles make many tiny holes, while chewing damage along leaf edges may indicate other insects. A few holes rarely justify drastic treatment; widespread defoliation during tuber formation deserves prompt attention. Follow product labels if a pesticide is used, and confirm that potatoes and the target pest both appear on the label.
Dark, water-soaked leaf lesions that spread in cool, damp weather warrant caution. Remove badly affected material without composting it, avoid moving through wet plants, and seek diagnosis from a local extension service when symptoms advance quickly. Similar-looking damage can have different causes, making treatment by appearance alone unreliable. Starting with clean seed, rotating beds, spacing plants for airflow, and keeping foliage dry are more dependable than waiting for a severe problem.
When Are Potatoes Ready to Harvest?
Potatoes can be harvested at two useful stages: shortly after flowering for tender new potatoes or after the foliage dies back for mature tubers. Flowering is a cue to check, not proof that every plant has formed a full crop. Gently feel near the edge of a hill or container and remove one test potato without disturbing the main stems. New potatoes have delicate skins and should be eaten soon.
For storage potatoes, allow the tops to yellow and die naturally unless disease requires earlier removal. Stop watering as the plants finish, provided the soil is not severely dry and cracked. Waiting roughly one to two weeks after the tops die helps the skins set, making tubers less prone to scraping during harvest. Extended waiting is unwise in saturated ground, hard freezes, or sites with active rodents.
Tip a container onto a tarp or loosen bed soil with a garden fork placed well away from the stems. Work inward carefully because fork punctures and shovel cuts reduce storage life. Keep harvested potatoes out of direct sun. Brush off loose soil after the surface dries, but do not scrub potatoes intended for storage. Set aside damaged tubers for prompt use rather than placing them with sound ones.
Cure mature, undamaged potatoes in a dark, ventilated location with moderate humidity and cool temperatures. Avoid refrigeration for routine curing and keep the crop away from light during storage. Inspect it periodically and remove soft, wet, or foul-smelling potatoes before decay spreads. Green areas indicate light exposure; discard heavily green tubers rather than trying to salvage them.
Yield varies with variety, weather, soil volume, spacing, and the length of the growing season. A lush canopy does not guarantee a large harvest, especially when nitrogen is excessive or heat interrupts tuber development. Record the variety, planting date, container size, and harvest condition. Those observations are more useful for improving next season than comparing one container with promotional yield claims made under different conditions.
Frequently Asked Questions
How many seed potatoes should go in one container?
Use one seed piece in a container of roughly 10 to 15 gallons. Wider containers can hold additional pieces when they remain about 10 to 12 inches apart and each has adequate soil volume.
Can I grow potatoes from grocery-store potatoes?
They may sprout, but certified seed potatoes are a better choice because grocery potatoes may be treated to suppress growth or may carry disease into the garden.
Do potato plants need full sun?
Aim for at least six hours of direct sunlight. In very hot climates, some afternoon shade may protect containers from overheating, though deep shade usually reduces growth.
Why are my potatoes green?
Green skin means the tuber was exposed to light. Hill the plants and cover exposed potatoes; discard heavily green tubers rather than eating them.
Can potatoes be grown in the same bed every year?
Rotating potatoes away from beds recently used for potatoes, tomatoes, peppers, or eggplants helps limit the buildup of shared pests and diseases. Use another bed or fresh container mix when possible.
Conclusion
A successful first potato crop depends on a few controllable decisions: use healthy seed stock, provide loose soil with reliable drainage, leave enough room between plants, and keep tubers covered as they develop. Containers suit limited space and difficult ground, but they demand closer moisture checks. Beds buffer heat and drying more effectively, provided the site does not remain wet.
Choose one variety and a modest planting rather than crowding several experiments together. Check moisture below the surface, watch leaf undersides for pests, and investigate early decline before applying extra fertilizer. Harvest a test potato after flowering if you want a fresh crop, or let the tops finish for firmer storage tubers. Recording the planting date, growing method, and harvest quality will make the next crop easier to plan.