Beginner landscaping that supports food production combines edible plants with a site layout that manages sunlight, water, access, and long-term maintenance. Map areas receiving at least six hours of direct sun, place frequently harvested crops near the house, and reserve permanent positions for fruit trees and perennial herbs. Build modest beds before adding decorative borders, using paths wide enough for a cart and irrigation that reaches plant roots without wetting unused ground. Productive landscaping works best when planting density matches available time, mature plant sizes are respected, and soil drainage is corrected before expensive plants are installed.
What you’ll learn
This guide covers the following practical points:
- Map Sun, Water, and Access Before Planting — A productive landscape plan should be based on observed site conditions rather than the empty spaces that appear easiest to fill.
- Organize the Landscape by Use and Harvest Frequency — Distance should reflect how often a planting needs attention.
- Build Soil and Control Water Movement — Soil structure and drainage usually deserve investment before decorative edging or additional plants.
- Combine Annual and Perennial Food Plants — A resilient edible landscape uses annual crops for quick harvests and perennial plants for structure.
Map Sun, Water, and Access Before Planting
A productive landscape plan should be based on observed site conditions rather than the empty spaces that appear easiest to fill. Track direct sunlight at several points during the day, note where rainwater collects or runs quickly, and identify routes used for hoses, carts, compost, and harvest baskets. A sunny bed that requires dragging a hose across a driveway will become inconvenient even if vegetables grow well there.
Most fruiting annuals, including tomatoes, peppers, squash, and beans, produce best in the sunniest available locations. Leafy greens, parsley, and some other herbs tolerate less light, although shade reduces growth when it becomes too deep. Observe the property in the growing season because a winter sun map does not show the shade cast by leafed-out trees.
| Site Condition | Suitable Productive Use | What to Check |
|---|---|---|
| Six or more hours of direct sun | Fruiting vegetables, berries, dwarf fruit trees | Summer shade and water access |
| Four to six hours of direct sun | Leafy vegetables, herbs, currants where climate permits | Whether light arrives in morning or afternoon |
| Low or wet ground | Drainage feature, path, or moisture-tolerant planting | Duration of standing water after rain |
| Area beside a daily route | Salad crops and frequently cut herbs | Foot traffic and soil compaction |
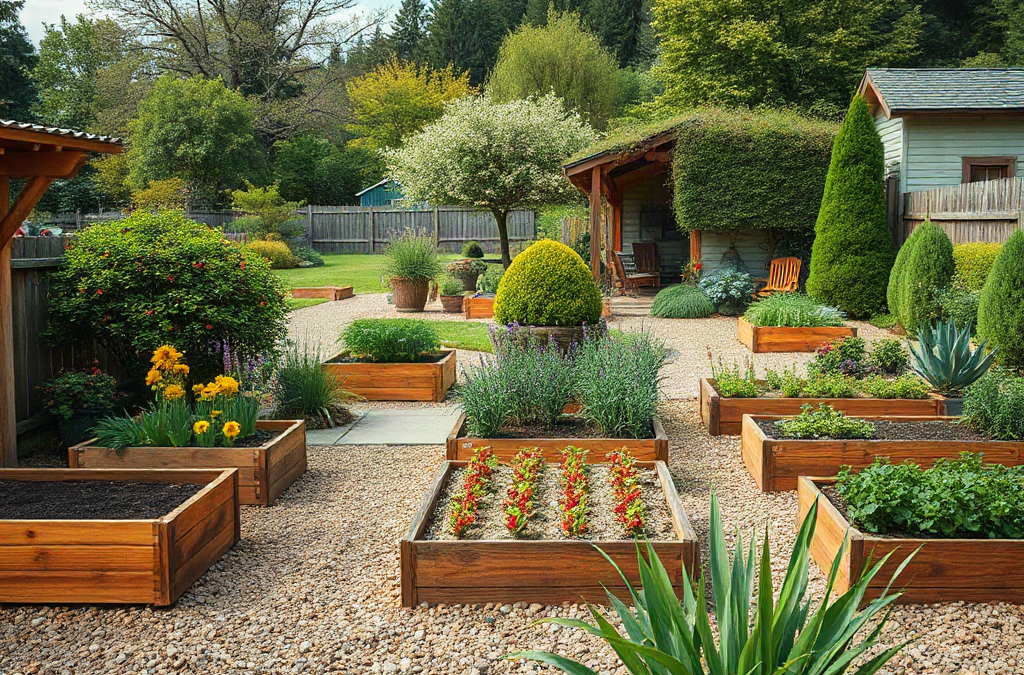
Do not assume raised beds solve every site problem. They can improve drainage and concentrate amended soil, but they cost more, dry faster, and may require imported material. An in-ground bed is often the practical choice where native soil drains adequately and can be improved with organic matter. Before construction, check for buried utilities and avoid placing edible beds where roof runoff, treated lumber, contaminated fill, or former chemical use creates uncertainty.
Organize the Landscape by Use and Harvest Frequency
Distance should reflect how often a planting needs attention. Put basil, salad greens, chives, cherry tomatoes, and other frequently picked crops near the kitchen or a well-used entrance. Crops harvested once or twice, such as winter squash, dry beans, storage potatoes, or tree fruit, can occupy less convenient ground.
Permanent plants require more foresight than seasonal vegetables. A young apple or pear tree may look undersized in a new bed, but its mature canopy can shade nearby crops and its roots can compete for moisture. Use the nursery’s mature dimensions, not the container size, when setting distances from buildings, paths, utility lines, and neighboring beds. Dwarfing rootstock can reduce tree size, but it may also require permanent staking and dependable irrigation.
Paths belong in the production plan because they determine whether beds can be weeded, watered, and harvested without compacting their soil. Make primary routes wide enough for the equipment actually used. Beds should be narrow enough to reach from the edge; stepping into them compresses pore spaces and makes drainage and root growth less reliable.
A common mistake is scattering edible plants wherever ornamental gaps remain. That creates small irrigation zones, awkward netting, and easily missed harvests. Edibles can still look intentional: repeat compact herbs along a sunny edge, group berries into a defined hedge, or train grapes on a sturdy arbor where dropped fruit will not foul a main walkway.
Build Soil and Control Water Movement
Soil structure and drainage usually deserve investment before decorative edging or additional plants. Begin with a soil test from a reputable laboratory or local extension service. The results can identify pH and nutrient conditions, preventing unnecessary fertilizer applications. Texture can be assessed separately by observing whether moist soil is gritty, sticky, or easily formed into a ribbon.
Spread finished compost over planting areas and keep the soil covered with mulch or living crops. Compost contributes organic matter, while mulch limits evaporation and reduces weed germination. Keep mulch away from trunks and plant crowns; a deep mound against bark holds moisture where decay and pest damage can begin. Avoid repeatedly tilling wet ground, which can break useful aggregates and leave a compacted layer beneath the worked surface.
Water should enter the root zone slowly enough to soak in rather than run away. Dripline or soaker hose is easier to target than broad overhead sprinkling, especially where edible beds sit among paths and ornamental areas. Check performance by digging a small inspection hole after watering. A damp surface over dry soil means the session was too brief, while persistently saturated soil suggests poor drainage, excessive watering, or both.
Direct roof water and slope runoff carefully. A rain garden may manage runoff in an appropriate location, but it is not automatically an edible bed; water quality, overflow routes, soil infiltration, and local conditions matter. Never build a berm that sends water toward a foundation or neighboring property. During the first season, watch the site during actual storms rather than relying only on the apparent grade.
Combine Annual and Perennial Food Plants
A resilient edible landscape uses annual crops for quick harvests and perennial plants for structure. Annual vegetables can change each year as household preferences become clearer. Berry shrubs, asparagus, rhubarb, culinary herbs, grapes, and fruit trees occupy space for years, so they should be chosen only after their mature spread, climate suitability, pollination needs, and maintenance are understood.
Pair plants according to compatible light, moisture, and access requirements rather than relying on broad companion-planting claims. Thyme under a sunny, well-drained edge may fit naturally, while moisture-loving vegetables beside it create conflicting irrigation needs. Likewise, planting vegetables under a new fruit tree may work briefly, but the area becomes shadier and more root-filled as the canopy develops.
Pollination requirements can affect whether fruiting plants yield. Some cultivars set fruit alone, while others need a compatible cultivar blooming at the same time. Confirm the requirement for the named cultivar before purchasing, particularly when there is room for only one tree. Local disease pressure and required pruning can matter more than an attractive catalog photograph.

Include flowers near food crops for bloom succession and landscape cohesion, but do not treat flowers as a substitute for crop monitoring. Inspect leaf undersides, remove diseased plant material when appropriate, and distinguish occasional insect feeding from damage that threatens a harvest. A diverse planting can provide habitat, yet tightly crowding plants reduces airflow and makes harvesting and inspection harder.
Install a Manageable First Phase
The best first phase is small enough to maintain during the busiest part of summer. One or two accessible vegetable beds, a short berry row, several culinary herbs, and one carefully positioned fruit tree can reveal how the property behaves without committing the entire yard. Expansion is easier after irrigation demand, weed pressure, wildlife activity, and actual harvest use are known.
Use a simple installation order so later work does not damage finished areas:
- Mark utilities, boundaries, drainage routes, and mature tree footprints.
- Lay out primary paths and confirm that equipment can turn and pass.
- Test soil, correct major drainage issues, and add suitable organic matter.
- Install irrigation before tightly spacing permanent plants.
- Plant trees and shrubs, then establish annual beds and low edging plants.
- Mulch, label cultivars, and record planting dates and locations.
Budget first for soil testing, dependable watering, path access, and healthy plants suited to the local climate. Decorative structures can follow. Cheap edging or an undersized trellis often needs replacement just as perennial plants mature, so omit a feature rather than installing one that cannot support its intended crop.
Judge the first season by function as well as yield. Water should reach each zone without constant hose rearrangement, paths should remain passable after rain, and harvests should be noticed before they become overripe. Repeated wilting, standing water, unreachable bed centers, chronic animal loss, or food going unused are signals to adjust the layout before adding more production space.
Conclusion
Productive landscaping succeeds when the property is treated as a working system rather than a collection of attractive plants. Observe summer light and stormwater, protect convenient access, and assign permanent crops enough mature space. Test the soil and establish efficient irrigation before expanding. A compact first installation provides useful evidence about maintenance, wildlife, and household harvest habits; use those observations to refine the next planting phase instead of repeating an inconvenient layout.
Frequently Asked Questions
How much sunlight does an edible landscape need?
Reserve the brightest areas, preferably with six or more hours of direct sun, for fruiting vegetables and many fruits. Use moderately sunny locations for leafy crops and selected herbs, while accounting for seasonal tree shade.
Should a beginner use raised beds or plant in the ground?
Use in-ground beds where soil drains well and contamination is not a concern. Choose raised beds when better drainage, easier reach, or control over imported soil justifies the added cost and faster drying.
Which food plants belong closest to the house?
Place crops needing frequent picking or monitoring nearby, such as salad greens, basil, parsley, chives, and compact tomatoes. Storage crops and once-a-year fruit harvests can be farther away.
Can vegetables grow beneath fruit trees?
They may grow beneath young trees temporarily, but increasing shade and root competition usually reduce the usefulness of that space. Plan the bed around the tree’s mature canopy rather than its current size.
What is the most common beginner landscaping mistake?
Installing too much at once creates watering, weeding, and harvesting demands that are difficult to sustain. Establish a compact first phase, observe it through a full growing season, and expand only after correcting access or drainage problems.