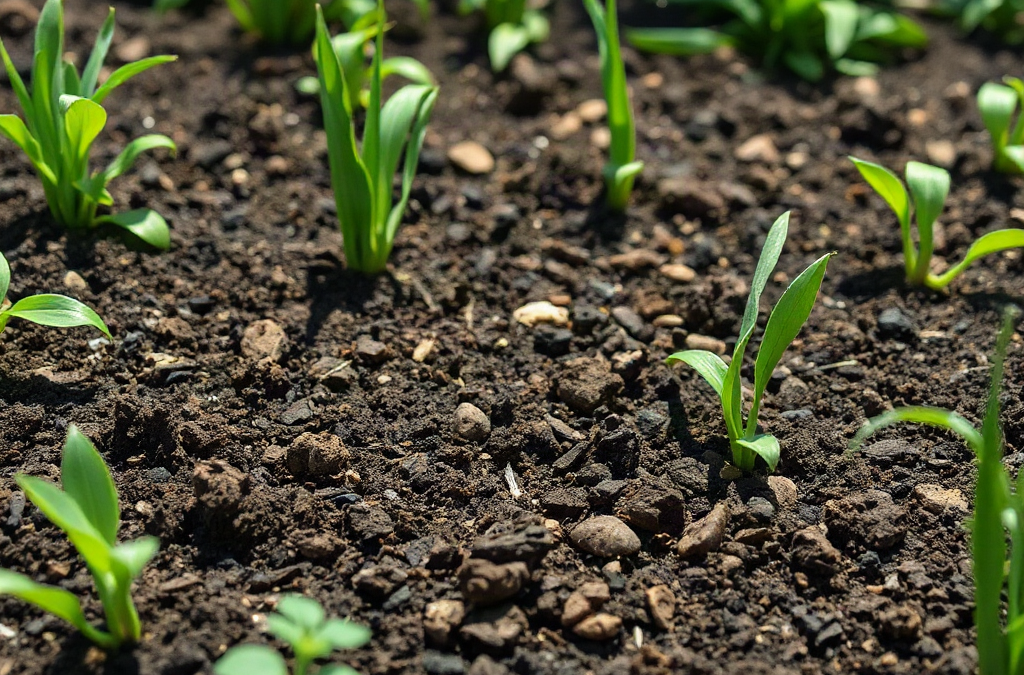
No-till gardening for beginners avoids soil compaction by keeping feet and equipment out of permanent growing areas, covering the surface with organic mulch, and planting with minimal disturbance. Beds should be narrow enough to reach from paths, while compost is added from above rather than mixed in by digging. Existing roots can usually remain in place after harvest, where their channels help water, air, and soil organisms move through the ground. If the starting soil is already dense, loosen only the affected layer with a garden fork, without turning it over, then protect it from traffic and heavy rain.
How Does No-Till Soil Stay Open Without Digging?
No-till soil remains workable through preserved pore spaces, living roots, organic matter, and the activity of organisms rather than through repeated mechanical cultivation. Digging can temporarily make a bed look loose, but it breaks apart aggregates and exposes buried organic matter. The loosened surface may then settle, crust, or compress under rain and traffic. Avoiding disturbance allows stable crumbs and channels to persist between seasons.
Roots are a major part of that structure. Fine roots leave small passages after they die, while larger crop roots create routes for water and future root growth. Earthworms and other soil organisms enlarge and connect some of those openings as they feed on decaying residues. Fungal growth also binds small mineral and organic particles into aggregates. These processes are gradual, so a new no-till bed may not have the soft texture of a long-managed bed during its first season.
Surface protection makes the system practical. Compost supplies decomposed organic material near the root zone, while straw, shredded leaves, leaf mold, or untreated grass clippings shield the ground from direct rain impact. Bare soil receives the full force of droplets, which can break surface aggregates and form a thin crust. Mulch also moderates drying, reducing the cycle of hardening and rapid rewetting that can make exposed clay difficult to manage.
No-till should not be confused with never touching the soil. Planting holes, narrow seed furrows, and careful broadfork or garden-fork use are compatible with the method when they address a specific need without inverting the profile. A deeply compacted construction site, for example, may need initial loosening before biological processes can maintain it. Push a fork into moist—not saturated—ground, rock it gently to open cracks, and withdraw it without lifting or flipping a slab.
Judge progress by function rather than by whether the bed feels fluffy. Water should soak in rather than stand for long periods, crop roots should extend beyond the planting hole, and the surface should resist crusting beneath its cover. Persistent puddling, roots that turn sideways, or a dense horizontal layer revealed by a test hole indicate that compaction still needs diagnosis. Adding more mulch will not correct buried rubble, a plow pan, or traffic damage on its own.
How Should Beds and Paths Be Designed to Prevent Compaction?
Permanent growing beds and permanent walking paths provide the clearest defense against renewed compaction. The bed must be narrow enough for every planting, weeding, and harvesting task to be completed from its edges. Many gardeners can comfortably reach roughly 18 to 24 inches from one side, but arm length, balance, bed height, and crop density matter more than a universal measurement. Test the reach before fixing the layout.
A bed accessible from both sides can be wider than one placed against a fence. Corners deserve attention because gardeners often step into them while stretching for a weed or fruit. If reaching the center requires leaning on the soil or placing a knee inside the bed, reduce the width or add a narrow access point. A slightly smaller growing area that never receives foot traffic usually functions better than a large bed that is routinely crossed.
Paths must support actual homestead work, not merely look tidy. Leave enough room for the widest tool that will regularly pass through, such as a wheelbarrow, garden cart, mower, or harvest basket carried at your side. Mulched paths are inexpensive and absorb traffic, although they need periodic topping up and may harbor creeping weeds. Gravel drains well but can migrate into beds. Living paths reduce purchased materials, yet their roots and mowing needs add competition and labor.
Use a simple layout check before building:
- Reach: Confirm that the center is accessible without hands, knees, or feet touching the growing surface.
- Traffic: Route hoses, carts, and harvest movement through paths rather than across beds.
- Drainage: Avoid placing beds where runoff collects or a path channels water into them.
- Edges: Mark boundaries clearly with string, low boards, stones, or a visible mulch change.
Raised wooden sides are optional. An unframed bed can work well when paths and growing zones remain distinct, and it avoids the expense and eventual replacement of lumber. Framed beds hold loose material on slopes and create obvious traffic boundaries, but narrow boards should not be treated as balance beams if stepping off would land in the bed. The essential feature is separation of uses, not the presence of a container.
Compaction can also come from concentrated loads that never involve a shoe. Set full watering cans, compost bags, harvest crates, and buckets in paths. Support trellises from bed edges where possible rather than repeatedly entering the plot for installation. If access becomes unavoidable after heavy rain, wait until the ground drains; wet soil deforms under much less pressure than soil at a workable moisture level.
How Do You Convert Existing Ground Without Tilling It?
Converting an existing plot begins with identifying what is beneath the vegetation. An established vegetable bed, thin lawn, compacted pasture, and fill soil over construction debris require different preparation. Dig several small inspection holes with a spade, keeping the removed slices intact. Look for rooting depth, standing water, abrupt texture changes, buried stone, and a smooth dense layer. This limited diagnosis prevents both unnecessary tillage and unrealistic reliance on cardboard and mulch.
For ordinary lawn on reasonably drained soil, mow closely and cover the area with overlapping plain cardboard, then add compost and a coarse organic mulch. Remove tape, glossy coatings, and plastic labels first. Wetting the cardboard helps it conform to the surface and reduces gaps around perennial grass. Cardboard is a temporary light barrier, not a permanent bed foundation; very thick stacks can slow water movement and make planting awkward before they soften.
When planting immediately, place compost above the barrier and open only the holes needed for transplants. Squash, tomatoes, brassicas, and other starts tolerate this approach better than tiny direct-sown seed. Carrots and similarly fine-rooted crops are poor first choices where turf, cardboard, or dense mineral soil remains close to the surface. Grow them later, after the barrier decomposes and the upper layer becomes easier to prepare as a shallow seedbed.
Persistent perennial weeds require more judgment. Bindweed, quackgrass, Canada thistle, and other plants with spreading underground structures can emerge through seams and planting holes. Removing accessible crowns and roots before covering may reduce pressure, but fragments can remain. Watch edges and new shoots regularly rather than assuming one deep mulch application has ended the problem. Repeatedly cutting regrowth at the surface avoids broad disturbance while gradually reducing the plant’s stored energy.

Dense subsoil calls for a different response. If a fork will barely enter at suitable moisture, or if water remains perched above a hard layer, open the ground before covering it. Work backward from a path, inserting a sturdy fork at intervals and levering just enough to form cracks. Do not perform this operation in saturated clay, which can smear and compress around the tines. Rocks, buried fabric, or severe grading damage may require excavation rather than a purist no-dig approach.
Finish the conversion with a modest compost layer and enough mulch to cover exposed soil without burying small plants. Excessively deep, wet material against stems encourages decay and creates hiding places for slugs. Keep mulch pulled back from seed rows and transplant crowns. The first season is primarily about establishing boundaries, suppressing unwanted growth, and keeping the surface protected; dramatic changes in deeper structure usually take longer.
Planting, Maintaining, and Troubleshooting No-Till Beds
No-till maintenance concentrates disturbance where a crop needs it and leaves the rest of the bed covered. For transplants, part the mulch, make a hole only large enough for the root ball, plant, water, and return the mulch without pressing it against the stem. For direct sowing, move coarse cover aside and prepare a narrow strip of fine compost or exposed soil. Small seeds need reliable soil contact; dropping them into chunky mulch usually produces uneven germination.
At harvest, cut healthy annual plants at soil level instead of pulling their entire root systems. The remaining roots decompose in place and preserve their channels. Remove a root mass when it carries a serious disease problem, obstructs the next planting, or belongs to a perennial weed that should not remain. Thick brassica stumps may be cut lower or removed selectively if they interfere with seeding, but routine uprooting is unnecessary.
Top-dress with finished compost when the bed needs organic material or a planting surface. A thin, even addition is easier to manage than repeatedly piling several inches around established crowns. Compost is not a substitute for nutrient diagnosis: pale leaves, weak growth, or poor fruiting can reflect pH, moisture, temperature, root damage, or a specific nutrient shortage. Before adding more amendments, inspect irrigation patterns and compare affected plants with healthy ones nearby.
Water behavior provides an early warning. If water runs off, check whether the mulch has become matted or whether the exposed surface has crusted. Lift and separate compacted mulch, then apply water slowly so it reaches the mineral soil. If water pools below the mulch, probe several spots and inspect drainage beyond the bed. No-till management preserves structure, but it cannot create an outlet where a low site remains saturated.
A hand trowel or narrow soil knife is often more useful than a rototiller for troubleshooting. Open a small vertical face and compare the top layer with the soil beneath it. A compacted band may appear smooth, blocky, nearly rootless, or sharply wetter than the layer above. Address that limited zone with fork loosening and traffic control rather than turning the entire bed. If only a frequently accessed corner is damaged, redesign access there instead of treating the whole plot.
Signs of success include crumbly material under the mulch, roots occupying old channels, steady infiltration, and fewer weeds germinating after soil disturbance. Failure signs include chronic standing water, sour-smelling saturated material, thick mulch pressed against stems, or repeated foot traffic during harvest. The most effective correction is usually operational: widen a path, improve hose placement, thin an overpacked mulch layer, or postpone work until wet soil has drained. No-till beds improve through consistent protection, not through complete neglect.
Frequently Asked Questions
Can I Start a No-Till Garden on Compacted Clay?
Yes, but inspect the depth of compaction first. Gently crack a dense layer with a garden fork when the clay is moist but not wet, add compost at the surface, and prevent future traffic with permanent paths.
How Deep Should Mulch Be in a No-Till Bed?
Use enough to cover exposed soil while keeping plant crowns and seed rows clear. The suitable depth varies with the material: coarse leaves or straw settle differently from fine grass clippings, which should be applied in thin layers to avoid matting.
Should Old Vegetable Roots Stay in the Ground?
Healthy annual roots can usually remain after the stems are cut at soil level. Remove roots associated with serious disease, invasive perennial weeds, or large crowns that physically obstruct the next crop.
Can I Walk on No-Till Beds in Winter?
Avoid walking on growing beds in every season, especially when they are wet. Use permanent paths or temporary boards placed within designated access routes rather than laying boards across the planting area.
Do I Need Cardboard Under Every No-Till Garden?
No. Cardboard can suppress lawn during conversion, but an established bed generally needs compost and surface cover rather than another barrier. Skip it where perennial weeds require removal or where thick layers would hinder water and planting.
Conclusion
A durable no-till system depends more on controlling pressure than on applying large amounts of material. Establish beds that can be reached from stable paths, keep tools and containers off the growing surface, and avoid working soil while it is saturated. Add finished compost from above, maintain breathable organic cover, and disturb only the narrow area required for planting.
Before converting difficult ground, inspect several small soil profiles. Ordinary turf may be covered and planted through, while a buried hard layer, rubble, or poor drainage needs targeted correction. Track infiltration, rooting depth, surface crusting, and wet spots through the first season. If problems remain, change the access, water delivery, mulch condition, or compacted zone responsible rather than tilling the entire plot. That measured approach preserves developing structure while still allowing practical intervention where the soil genuinely needs it.

Additional Resources
Authoritative Sources
- No-till gardening builds healthier soil at home
extension.oregonstate.eduExtension horticulturist explains how to protect soil structure, use mulch and cover crops, and build “lasagna” beds.
- Low and No-Till Gardening - UNH Extension
extension.unh.eduOct 16, 2020 — a critical aspect of no and low till gardening is to cut your plants at the soil line rather than pulling them out by the roots.