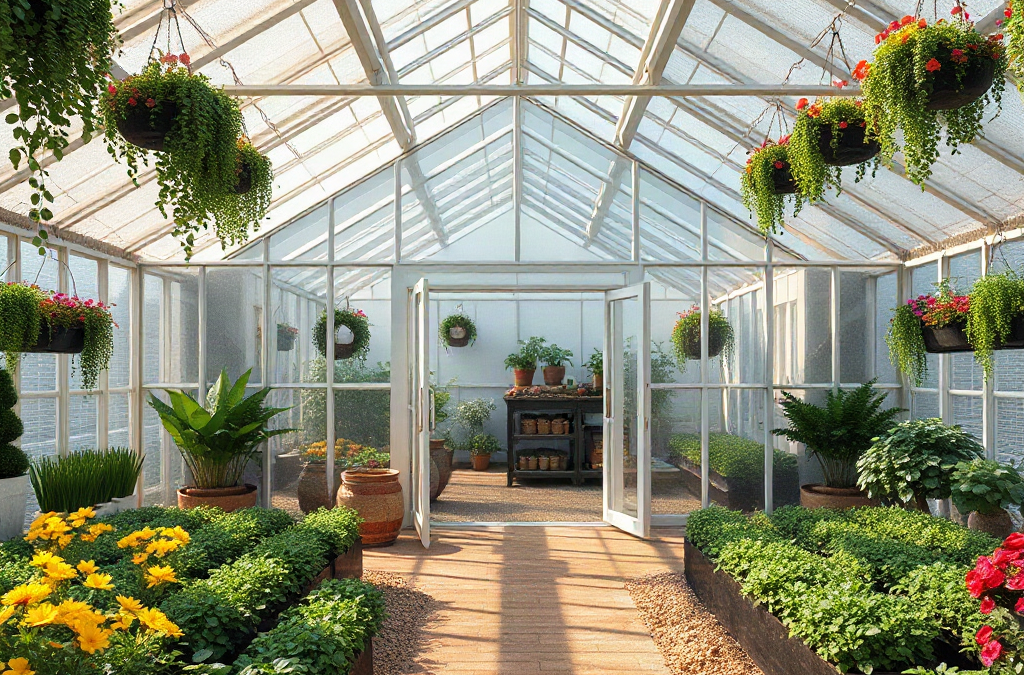
A beginner greenhouse should be sized around usable bench space and access paths, covered with glazing suited to the local wind, snow, and growing season, and ventilated to release heat and humidity before plants are stressed. Allow room to work without crowding leaves against the walls, where condensation and temperature swings are strongest. Polycarbonate usually offers a practical balance of durability, insulation, and light diffusion, while greenhouse film costs less but needs more frequent replacement. Provide both low air inlets and high exhaust openings, because an undersized vent system can turn a sunny greenhouse dangerously hot even during cool weather.
How Large Should a First Greenhouse Be?
Greenhouse size should be calculated from the interior layout rather than the outside dimensions printed on a product listing. Benches, containers, water storage, door clearance, and paths consume a surprising share of the floor. An 8-by-10-foot structure provides 80 square feet on paper, but a central aisle 30 inches wide uses roughly one-quarter of that area before shelving or equipment is added.
Begin by listing what will actually happen inside. Seed starting needs shallow trays, reachable shelves, and space for potting. Growing tall tomatoes through summer requires greater roof height, deep containers or beds, support lines, and enough clearance for air to move around mature foliage. Overwintering potted plants may demand less working space but more room between leaves, especially when low temperatures slow evaporation.
Mark the proposed footprint outdoors with stakes and string, then represent the benches and paths with boards, buckets, or cardboard. Walk through the layout while carrying a watering can. Open the planned door fully and test whether a wheelbarrow, tray, or container can turn without striking plants. This simple trial exposes narrow entrances and unreachable corners that are difficult to recognize from a floor plan.
| Planned Use | Space Priority | Common Layout Mistake |
|---|---|---|
| Starting seedlings | Shallow benches and adjustable shelves | Leaving no dedicated potting surface |
| Summer vegetables | Headroom, plant spacing, and supports | Measuring only the containers, not mature plants |
| Season extension | In-ground beds with a clear central path | Making beds too wide to reach from the aisle |
| Overwintering plants | Uncrowded floor and shelf capacity | Ignoring the space occupied by heaters or water barrels |
A modest structure that can be ventilated, watered, and maintained reliably is more useful than a larger one that strains the budget. The purchase price is only part of the difference. More covered area means more glazing to repair, more air to heat in cold conditions, and a larger foundation exposed to wind loads.
Do not make the greenhouse so small that every surface must hold a plant. Crowding blocks airflow, leaves no quarantine space for pest problems, and makes routine cleaning difficult. If the site and budget permit, reserve some capacity for a potting bench and future crop growth. Favor length over excessive width when expanding a simple freestanding design; long benches remain accessible, while a very wide building may require extra aisles that add floor area without adding much reachable growing space.
Which Greenhouse Glazing Should You Choose?
Glazing controls far more than the appearance of a greenhouse. It affects light distribution, heat loss, structural weight, impact resistance, maintenance, and the frame required to hold the covering. The best choice is the material that fits the intended season and local exposure, not necessarily the option with the highest light transmission or lowest initial price.
Greenhouse film is inexpensive, lightweight, and practical for hoop houses or seasonal structures. A properly tensioned covering sheds wind better than loose film, which flaps, rubs against the frame, and fails prematurely. Film is vulnerable to punctures from branches, tools, and sharp frame edges, and it eventually requires replacement. Double-layer inflated film can create an insulating air space, but it adds a blower and another component that needs dependable power and inspection.
Twin-wall or multiwall polycarbonate is a common choice for small permanent greenhouses because its internal channels provide some insulation and diffuse direct sunlight. Diffused light reduces hard shadows and reaches foliage from more angles, although no glazing compensates for a deeply shaded site. Polycarbonate panels must be installed with the channels oriented so condensation can drain. The open ends also need the closure or vented tape specified for the panel system; otherwise moisture, algae, and debris can enter the flutes.
Single-pane glass remains clear and long-lived when it is installed in a suitable frame, but it is heavy, breakable, and relatively poor at retaining heat compared with multiwall panels. Tempered safety glass is a more appropriate choice where breakage could endanger people, yet it raises the project cost. Acrylic panels are clear and lighter than glass, though expansion, fastening requirements, scratching, and product-specific durability must be considered.
Compare glazing on the conditions it will face:
- For a low-cost seasonal house: greenhouse-grade film may be the sensible starting point.
- For a permanent, multipurpose structure: multiwall polycarbonate often balances insulation, weight, and impact resistance.
- For a carefully framed display greenhouse: glass offers clarity and traditional appearance but demands a suitable structure and safe handling.
A frequent mistake is buying panels before confirming frame spacing and fastening details. Panels expand and contract, and overtightened screws can distort them or create leak points. Check the manufacturer’s installation instructions, minimum bending radius, ultraviolet-protected side, compatible sealants, and required edge support. In snowy locations, glazing selection cannot be separated from roof pitch and frame capacity. A strong panel attached to an inadequate frame does not create a snow-rated greenhouse.
How Much Ventilation Does a Greenhouse Need?
Greenhouse ventilation must remove solar heat while replacing humid, stagnant air around the crop. Sunlight can raise the interior temperature rapidly even when outdoor air feels cool. Waiting until plants wilt is too late: closed stomata, overheated roots, poor pollen performance, and scorched leaves may appear after the damaging temperature rise has already occurred.
Passive ventilation uses high outlets and lower inlets. Warm air rises and escapes through roof vents, while cooler replacement air enters closer to ground level. The system works best when openings are distributed rather than concentrated in one doorway. Roof vents should release the hottest air at the peak, and low vents should admit replacement air without blasting one row of plants. Wind can strengthen natural airflow, but buildings, hedges, and uneven terrain may also create sheltered pockets where passive exchange is weak.
Powered exhaust is more predictable during still weather. An exhaust fan is normally placed high at one end, with adequately sized intake shutters or vents at the opposite end. If the intake area is too restricted, the fan struggles to move its rated airflow, shutters may not open fully, and air can enter through unwanted gaps. Circulation fans inside the structure serve a different purpose: they reduce dead zones and mix the air, but they do not replace hot air with cooler outdoor air.
Automatic vent openers are useful where the greenhouse cannot be watched throughout the day. Many operate in response to heat without household electricity, but their opening range, lifting capacity, adjustment, and maintenance vary. A powered system needs a temperature controller appropriate for the equipment and a plan for power interruptions. A stuck shutter, failed opener, or tripped circuit on a clear day can become a crop-threatening problem.

Use this operating check during the first bright days after installation:
- Place thermometers at plant height in both the sunny and shaded parts of the house.
- Observe when vents begin opening and whether intake openings respond freely.
- Check for still, damp corners behind dense foliage or under benches.
- Confirm that doors, roof vents, and fans can operate without hitting plants or supports.
- Recheck after crops fill the space, because mature foliage changes airflow.
Condensation is a useful warning sign but not a complete diagnosis. Water on the glazing may result from humid air meeting a cold surface, while persistent droplets on leaves point to poor air movement, excessive evening watering, crowding, or inadequate exchange. Water early enough for foliage and surfaces to dry before temperatures fall. Shade cloth can reduce summer heat gain, but it should complement ventilation rather than conceal an undersized vent system.
Plan the Structure as One System
Size, glazing, ventilation, orientation, and anchoring must work together. Changing one element alters the demands on the others. A larger greenhouse accumulates more solar energy but may offer more stable temperatures than a tiny enclosure. Insulating glazing slows heat loss after sunset, yet the same structure still requires generous venting in sunshine. A lightweight covering reduces frame load while presenting a broad surface for wind to pull against.
Site selection comes before the final equipment order. Observe winter and summer sun paths, nearby trees, roof runoff, standing water, prevailing wind, and access to electricity and irrigation. Morning sun helps warm the structure early, while uninterrupted southern exposure is valuable during shorter days in the Northern Hemisphere. Summer shade from a deciduous tree may sound useful, but falling branches, roots, leaf litter, and changing shade patterns introduce other problems.
Choose a level, well-drained base and use anchors intended for the frame and ground conditions. A greenhouse is not protected merely because it is heavy or filled with beds. Wind creates uplift and pressure on doors, panels, and roof surfaces. Loose doors and partially open vents can worsen damage during severe weather, so closures should be easy to inspect and secure. Local permits, setbacks, utility locations, and structural requirements vary; verify them before preparing the foundation or ordering a kit.
A practical purchasing sequence prevents incompatible parts:
- Define the crops and season. Decide whether the structure is for propagation, summer production, winter protection, or a combination.
- Test the interior plan. Lay out beds, benches, aisles, equipment, and door movement at full scale.
- Assess the site loads. Consider wind exposure, snowfall, drainage, shade, and available utilities.
- Select the frame and glazing together. Confirm panel dimensions, support spacing, fasteners, and replacement availability.
- Design ventilation before assembly. Reserve space for roof vents, low inlets, controls, fans, and unobstructed airflow.
Budgeting only for the shell is a common failure mode. Foundations, anchors, automatic openers, fans, wiring, irrigation fittings, benches, shade cloth, thermometers, and replacement glazing can materially change the total. Heating deserves separate scrutiny because fuel or electricity use depends on outdoor conditions, air leakage, glazing, desired temperature, and greenhouse area. Build the envelope first, monitor its behavior through changing weather, and add equipment in response to observed needs rather than assumptions.
Signs of a sound setup are straightforward: paths stay usable as crops mature, vents open before heat builds, interior air does not remain wet and still, and panels stay secure without bowing or leaking around fasteners. Repeated midday overheating, dripping foliage, inaccessible plants, loose glazing, or doors that cannot open around containers indicate that the system needs correction rather than another shelf of plants.
Frequently Asked Questions
Is an 8-by-10-foot greenhouse large enough for a beginner?
It can be large enough for seed trays, several containers, or two narrow benches, provided the aisle and door remain usable. Mark the dimensions outdoors and test the layout before buying.
Is glass or polycarbonate better for a first greenhouse?
Multiwall polycarbonate is often easier to handle and offers better insulation than single-pane glass. Glass may suit a permanent display structure, but its weight, breakage risk, frame requirements, and cost need careful evaluation.
Can opening the greenhouse door provide enough ventilation?
A door alone rarely provides even ventilation because hot air collects near the roof and distant corners may remain stagnant. High exhaust openings paired with lower air inlets create a more effective flow path.
Do circulation fans cool a greenhouse?
Circulation fans mix interior air and reduce stagnant pockets, but they do not remove accumulated heat. Cooling requires an exchange with outdoor air, reduced solar gain, or both.
Should a greenhouse be placed in full sun?
Reliable sun is especially valuable for cool-season and winter use, but the site also needs drainage, wind protection that does not create shade, and room for ventilation. Seasonal shade cloth is easier to control than permanent building or tree shade.
Conclusion
A useful greenhouse begins with an honest floor plan, not the largest shell that fits the site. Mark out benches, beds, mature plants, equipment, and paths before choosing dimensions. Match the covering to the expected season, weather exposure, frame, maintenance tolerance, and replacement budget; multiwall polycarbonate and greenhouse film solve different problems, while glass brings distinct structural demands.
Ventilation should be designed before the structure is assembled. Provide a clear route from low inlets to high outlets, distinguish circulation from air exchange, and monitor temperatures at crop height during bright weather. The next step is to assess the proposed site for sun, drainage, wind, snow, utilities, and local requirements, then compare greenhouse packages as complete systems. Space that remains workable and equipment that responds reliably will matter more than extra features that do not address the site’s actual conditions.

Additional Resources
Authoritative Sources
- Greenhouse Gardening A Beginners Guide To Growing
business.jacksonms.govThis guide will walk you through the essentials, from choosing the right structure to understanding plant care, so you can thrive in your greenhouse gardening ... Read more